That perfect tomato with the deep, old-fashioned flavor is more than dinner. If it came from an open-pollinated heirloom plant, it can also become next year’s garden. Learning how to save heirloom seeds is one of the most satisfying ways to make your garden more self-reliant, spend less on seed packets, and keep favorite varieties growing in your own backyard.
The process is not difficult, but a little care makes a big difference. Seeds must come from the right plants, be fully mature, dry thoroughly, and stay protected from heat and moisture. Start with one or two easy crops, and you will quickly build the confidence to save more.
Start With the Right Plants
Heirloom seeds are generally open-pollinated, meaning a plant’s seeds should produce plants much like the parent. That is what makes seed saving worthwhile. A Cherokee Purple tomato seed, for example, should grow a Cherokee Purple tomato plant next season if it was not crossed with another tomato variety.
Do not save seed from plants labeled F1 or hybrid. Hybrids are created by crossing two different parent plants. Their seeds may germinate, but the next generation can be unpredictable. You might get a healthy plant, but the fruit, flavor, size, or disease resistance may be very different from what you planted.
Choose seed from your healthiest, most productive plants. This is a quiet form of selection that improves your garden over time. If one bean plant stayed healthy through a dry spell or one lettuce plant resisted bolting longer than the rest, it is a strong candidate for seed saving.
Avoid saving seeds from plants with obvious disease, stunted growth, or badly misshapen fruit unless that unusual shape is normal for the variety. Seed saving should preserve the qualities you love, not carry forward problems.
Keep Varieties From Crossing
Some crops mostly pollinate themselves, so they are easy choices for beginning seed savers. Tomatoes, beans, peas, lettuce, and peppers usually work well in a home garden. Occasional crossing can happen, especially with peppers, but it is less likely than with crops that depend heavily on insects for pollination.
Squash, cucumbers, melons, corn, and members of the cabbage family cross much more readily. If you grow several varieties of these crops close together, the seeds may not grow true to type. A butternut squash can cross with certain pumpkins, for instance, though not every squash species can cross with every other one.
You do not need to turn a small backyard garden into a seed-production farm. If you are growing for household use, start with self-pollinating crops. When you are ready to save seed from squash or cucumbers, grow one variety of a species at a time, separate compatible varieties as much as your space allows, or hand-pollinate and cover flowers before and after pollination.
It is also worth knowing that cross-pollination affects the seeds, not the fruit you harvest this year. A pepper still tastes like the pepper you grew. The surprise shows up only if you plant its seeds next season.
Let Seeds Mature Fully
The biggest beginner mistake is collecting seeds from vegetables at eating stage rather than seed-saving stage. Many crops need extra time on the plant.
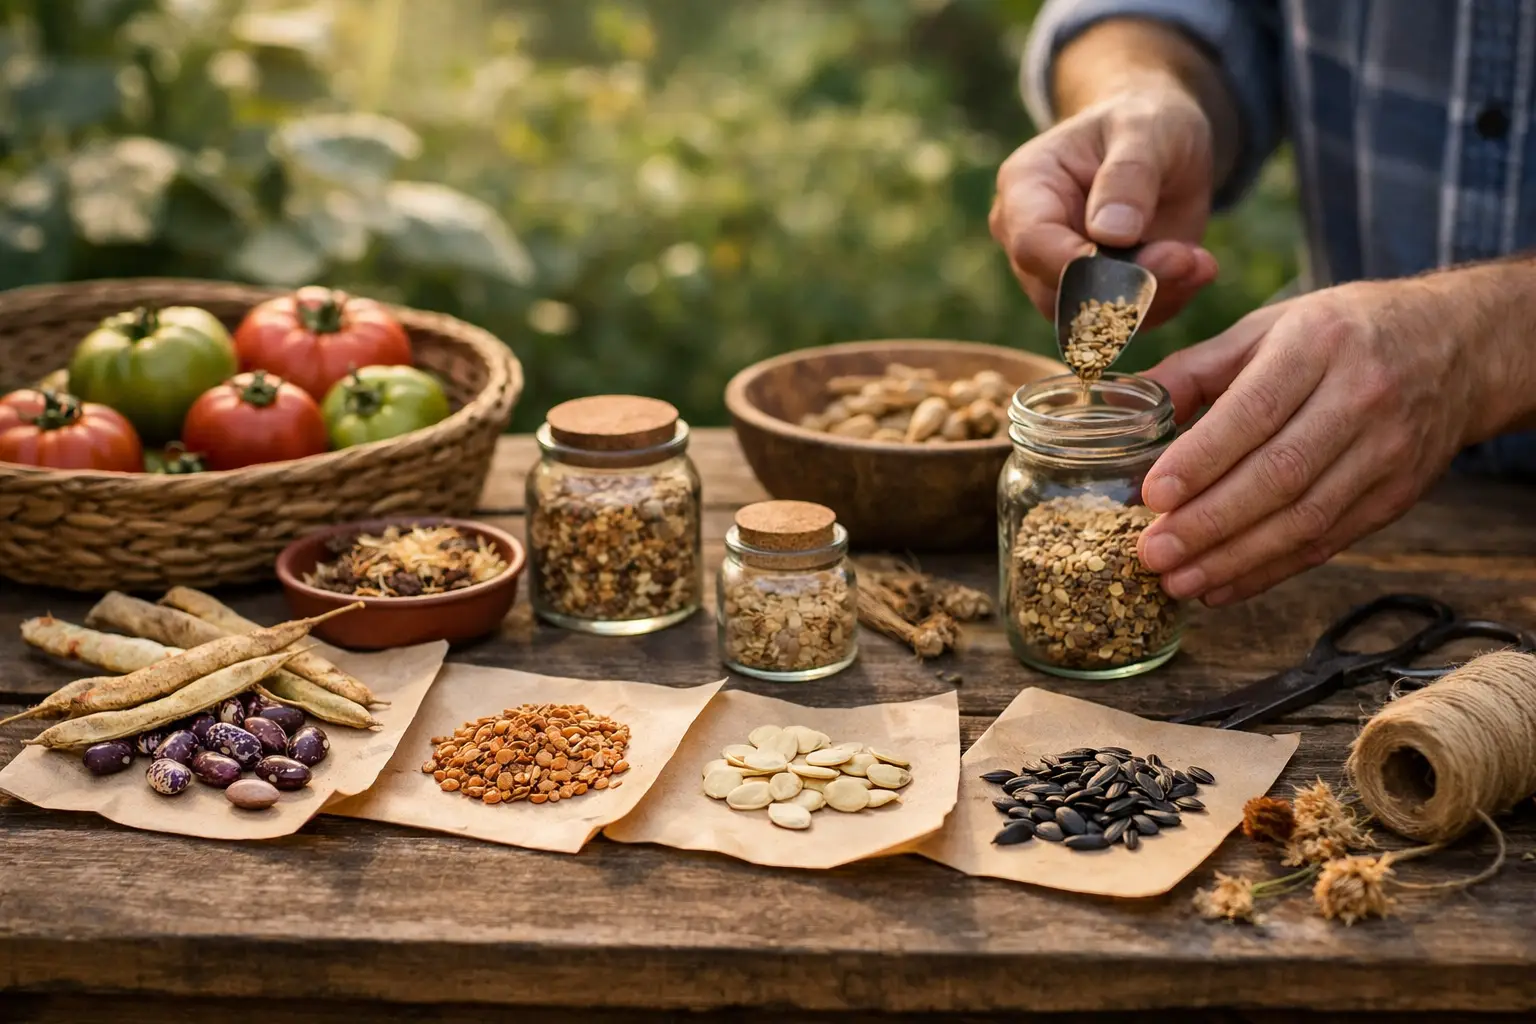
For dry-seeded crops such as beans, peas, lettuce, and many flowers, let pods or seed heads dry and turn brown before collecting them. Bean and pea pods should feel papery, and the seeds inside should be hard. If rainy weather arrives before they dry, pull the whole plant and hang it indoors in a dry, airy place to finish.
For fleshy crops, wait until fruit is fully ripe, often a little beyond the stage you would choose for the kitchen. Tomatoes should be soft and richly colored. Peppers should ripen to their mature color, which may be red, yellow, orange, or brown depending on the variety. Cucumbers grown for seed need to become oversized and yellow or orange, not the crisp green cucumbers you would slice for a salad.
Squash requires even more patience. Leave mature squash on the vine until the rind is hard and the stem has dried down. Then cure the fruit for several weeks in a warm, dry place before removing the seeds. This gives the seeds time to finish developing.
How to Save Heirloom Seeds by Crop Type
Most home gardeners can use one of three simple methods: dry processing, rinsing, or fermenting.
Dry processing for beans, peas, lettuce, and flowers
Once pods and seed heads are dry, crumble them gently over a bowl, tray, or clean sheet. Separate seeds from the chaff with your fingers. A light breath of air or a small fan can help blow away papery debris, but do this gently so you do not lose the seeds along with it.
Spread cleaned seeds in a single layer on a plate, screen, or coffee filter for another week or two. Avoid paper towels, which can stick to damp seeds. When a large seed snaps rather than bends, it is usually dry enough to store.
Rinsing for peppers, squash, and cucumbers
Scoop seeds from ripe fruit into a bowl. Rinse away as much pulp as possible in a fine strainer, then spread the seeds in a single layer to dry. Squash seeds are especially easy to handle after rinsing, and a clean dish towel can help remove the slippery coating.
Turn seeds once or twice a day while they dry. Keep them out of direct sun and away from high heat. A sunny windowsill may look convenient, but intense heat can reduce germination.
Fermenting tomato seeds
Tomato seeds have a gel coating that can inhibit germination and may shelter disease organisms. Fermentation removes that coating.
Squeeze tomato pulp and seeds into a small jar, add a little water if needed, and cover the opening loosely. Let it sit at room temperature for two to four days. A layer of mold may form on top, and while it can look alarming, that is normal.
Once the mixture smells sour and the seeds have settled toward the bottom, add water and stir. Pour off floating pulp and immature seeds, then repeat until the heavier seeds remain. Strain them, spread them onto a coffee filter or ceramic plate, and let them dry completely for at least a week.
Drying Is Where Good Seeds Are Made
Seeds that feel dry on the outside can still hold enough moisture to mold in storage. Give them more drying time than you think they need, especially in humid climates. A room with good airflow is better than a hot shed, greenhouse, or damp basement.
Small seeds should feel crisp and separate easily. Larger seeds, such as beans or squash, should be hard enough that a fingernail cannot easily dent them. If you are uncertain, wait a few more days. Overdrying is rarely a problem in normal home conditions; storing seed while it is still damp is the real risk.
Keep varieties separate from the beginning. It is surprisingly easy to mix up two nearly identical piles of tomato or pepper seeds while cleaning them.
Label and Store Seeds Carefully
A plain envelope works well for most fully dry seeds. Write the crop, variety, and year on it right away. Add a note about where it grew or why you saved it, such as “earliest tomatoes” or “best flavor.” Those little observations become valuable when you are choosing what to grow next spring.
Place labeled envelopes in an airtight jar, tin, or food-storage container. Store the container somewhere cool, dark, and dry. A refrigerator is excellent if the seeds are thoroughly dry and protected from moisture. Avoid garages, sheds, and sunny kitchens, where temperatures swing wildly.
Most properly stored vegetable seeds remain useful for several years, though longevity varies. Onion and parsnip seed loses viability quickly, often within a year or two. Tomatoes, beans, peas, and lettuce commonly last longer. If you are saving a treasured variety, do not wait until the last few seeds remain before growing it again and refreshing your supply.
Test Older Seeds Before Planting
When you are unsure whether saved seeds are still good, test a few before planting time. Place 10 seeds on a damp paper towel, fold it over, and slip it into a loosely closed plastic bag or container. Keep it warm and check daily.
If eight of 10 seeds sprout, you have about 80 percent germination and can plant normally. If only a few germinate, sow more thickly or replace the seed. This simple test prevents the disappointment of waiting on an empty garden row.
Saving seeds is partly practical and partly personal. Each labeled envelope holds proof of what grew well in your soil, weather, and care. Start with the bean, tomato, or lettuce that made you proud this season, and let next year’s garden begin with a small handful of seeds you saved yourself.