Target keyword: how to plant garlic in fall
📋 Table of Contents
- Why Plant Garlic in Fall?
- When to Plant Garlic in Fall
- Choosing the Right Garlic Variety
- Hardneck Garlic (Allium sativum var. ophioscorodon)
- Softneck Garlic (Allium sativum var. sativum)
- Elephant Garlic (Not True Garlic)
- Where to Buy Seed Garlic
- What You’ll Need
- Step-by-Step: How to Plant Garlic in Fall
- Step 1: Prepare Your Soil
- Step 2: Break Apart the Bulb
- Step 3: Plant the Cloves
- Step 4: Fertilize Lightly
- Step 5: Water In
- Step 6: Mulch Heavily
- Caring for Garlic Through Winter
- Spring Care: What Happens After Winter
- When to Harvest
- Curing and Storing Garlic
- Common Problems & Organic Solutions
- White Rot (Sclerotium cepivorum)
- Fusarium Basal Rot
- Bulb Mites
- Yellowing Leaves in Spring
- Garlic in Raised Beds: Insider Tips
- FAQ: How to Plant Garlic in Fall
- Conclusion: Grow Your Best Garlic This Fall
- Garlic & Seasonal Planting Guides
Volume estimé: 40,000–60,000/mois (US)
Intent: Informational + Transactional (garlic bulb purchases)
Catégorie: Growing Vegetables
Longueur cible: 2,500–3,000 mots
Liens affiliés: Amazon (garlic bulbs, bulb planters, row cover)
Focus keyword (Yoast): how to plant garlic in fall
Méta title: How to Plant Garlic in Fall: Step-by-Step Guide for Beginners (2026)
Méta description: Learn exactly how to plant garlic in fall — from choosing varieties to spacing, depth, and winter care. Our organic method gives you bigger, tastier bulbs next summer.
Planting garlic in fall is one of the best decisions you can make as an organic gardener. Unlike spring-planted vegetables, fall garlic gets a head start — it establishes roots before the ground freezes, then bursts back to life in spring with a long growing season ahead of it.
The result? Bigger bulbs, deeper flavor, and a harvest you’ll talk about all summer long.
In this guide, I’ll walk you through everything: when to plant, which varieties to choose, how deep to plant, and how to protect your garlic through winter — all using 100% organic methods.
Why Plant Garlic in Fall?
Garlic is one of the few vegetables that actually needs a cold period to develop properly. This process — called vernalization — triggers the plant to form the individual cloves that make up the bulb.
When you plant in fall (typically 4–6 weeks before the ground freezes), garlic:
- Develops a strong root system before dormancy
- Experiences the cold period it needs to form cloves
- Gets a full growing season come spring
- Produces significantly larger bulbs than spring-planted garlic
Spring-planted garlic skips the vernalization stage, resulting in single-bulb “rounds” instead of fully formed multi-clove bulbs. For most gardeners in USDA zones 3–9, fall is the only reliable time to plant.
When to Plant Garlic in Fall
The ideal window is 4–6 weeks before your first hard frost (a freeze of 28°F / -2°C for several hours).
This gives the cloves enough time to develop roots without sending up too much green growth — a long shoot emerging before winter can freeze back and weaken the plant.
| USDA Zone | First Hard Frost | Plant Garlic |
|---|---|---|
| Zone 3–4 | Late September | Late August – Early September |
| Zone 5–6 | Mid–Late October | September – Early October |
| Zone 7 | November | October – Early November |
| Zone 8–9 | December | November |
| Zone 10+ | Rarely freezes | January–February (short-day varieties) |
Pro tip: In zone 6-7 (the most common US gardening zone), the sweet spot is mid-October — which is right now if you’re reading this in fall.
🌡️ Not sure of your zone? Check the USDA Plant Hardiness Zone Map.
Choosing the Right Garlic Variety
There are two main types of garlic: hardneck and softneck. Choosing the right one for your climate is the most important decision you’ll make.
Hardneck Garlic (Allium sativum var. ophioscorodon)
- Best for: Zones 3–6 (cold winters)
- Flavor: Complex, rich, more nuanced
- Cloves per bulb: 4–12 large cloves
- Storage: 4–6 months
- Bonus: Produces scapes in late spring — a culinary delicacy
Best hardneck varieties:
- Rocambole (German Red, Spanish Roja) — rich, spicy flavor; stores 4 months
- Porcelain (Music, Georgian Crystal) — very large cloves, stores up to 8 months
- Purple Stripe (Chesnok Red) — great for roasting, stores 6 months
Softneck Garlic (Allium sativum var. sativum)
- Best for: Zones 7–10 (mild winters)
- Flavor: Milder, slightly less complex
- Cloves per bulb: 8–20 smaller cloves
- Storage: 9–12 months (what you find in grocery stores)
- Bonus: Excellent for braiding
Best softneck varieties:
- Silverskin — longest storage, mild flavor
- Artichoke (California Early, Inchelium Red) — large bulbs, reliable in mild climates
Elephant Garlic (Not True Garlic)
Technically a leek (Allium ampeloprasum), elephant garlic produces enormous bulbs with a very mild, almost buttery flavor. Plant it if you want a conversation piece or prefer mild garlic. Same planting method as hardneck.
Where to Buy Seed Garlic
Always plant seed garlic — not grocery store garlic. Supermarket garlic is often:
- Treated with growth inhibitors to prevent sprouting
- Imported varieties that may not be suited to your climate
- Potentially carrying diseases
Good sources for certified organic seed garlic:
- Keene Organics — wide hardneck selection
- Filaree Garlic Farm — 120+ varieties
- Southern Exposure Seed Exchange — great for zones 6-8
- Local farmers’ markets in September–October
💡 Amazon affiliate note: Music Garlic Bulbs (top hardneck variety) — excellent for zones 5–7, stores up to 8 months.
What You’ll Need
Tools:
- Garden fork or bulb planter
- Ruler or dibber for depth
- Trowel
Materials:
- Seed garlic bulbs (separated into individual cloves, paper skin intact)
- Compost (1–2 inches to top-dress beds)
- Mulch (straw, shredded leaves) — 4–6 inches
- Optional: Organic granular fertilizer low in nitrogen
Step-by-Step: How to Plant Garlic in Fall
Step 1: Prepare Your Soil
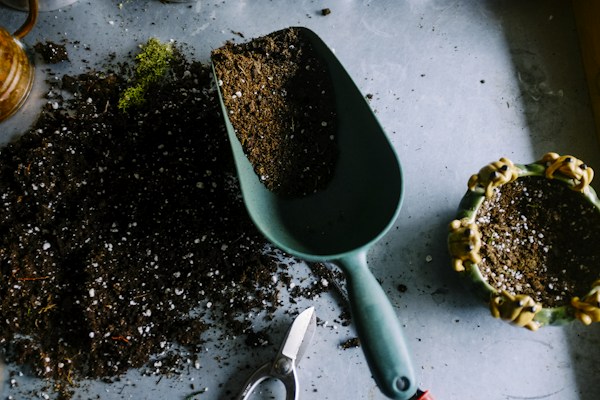
Garlic loves loose, well-draining, fertile soil with a pH between 6.0 and 7.0.
In a raised bed:
Fill with a mix of:
- 60% quality raised bed mix or loamy topsoil
- 30% compost
- 10% perlite for drainage
In-ground beds:
- Loosen soil to 12 inches deep with a garden fork
- Work in 2–3 inches of finished compost
- Avoid high-nitrogen fertilizers (promotes leaves over bulbs)
If your soil drains poorly, garlic will rot. Raised beds solve this completely.
Step 2: Break Apart the Bulb
Just before planting, gently separate the garlic bulb into individual cloves. Leave the papery skin on each clove — it protects against disease and fungal issues.
Plant the largest cloves. The bigger the clove, the bigger the bulb. Reserve small inner cloves for cooking.
Step 3: Plant the Cloves
- Depth: 2–3 inches deep (tip of clove pointing UP)
- Spacing: 4–6 inches between cloves, 6 inches between rows
- Orientation: Always plant with the pointed end up and the flat basal plate down
For raised beds, plant in a grid pattern — 6 inches each way — for maximum density.
Planting depth matters: Too shallow and the cloves may heave out of the soil when it freezes and thaws. Too deep and they’ll take longer to emerge in spring.
Step 4: Fertilize Lightly
After planting, top-dress with:
- 1 inch of finished compost, OR
- A light application of bone meal (promotes root development, not leaf growth)
Avoid blood meal or other high-nitrogen fertilizers in fall — you don’t want to push tender green growth before winter arrives.
Step 5: Water In
Give the bed a thorough watering after planting. Then let fall rains take over — garlic doesn’t need much water during dormancy.
Step 6: Mulch Heavily
This is the most important step for cold-climate gardeners.
Apply 4–6 inches of mulch after the ground begins to freeze (not before — you want mice to find somewhere else to nest):
- Straw — best option, light and doesn’t compact
- Shredded leaves — free and effective
- Straw + leaves mix — excellent insulation
The mulch:
- Moderates soil temperature swings
- Prevents frost heaving
- Retains moisture in spring
- Suppresses early weeds
Caring for Garlic Through Winter
Once planted and mulched, fall garlic is essentially maintenance-free until spring.
- Watering: None needed — let winter precipitation do the work
- Fertilizing: Do not fertilize until green shoots appear in spring
- Check-ins: Peek under the mulch in late winter — some green tips may have pushed through the mulch layer; this is normal
Spring Care: What Happens After Winter
Early Spring:
- Green shoots will emerge through the mulch as temperatures warm (late March to April, depending on zone)
- Pull back some mulch if shoots are struggling to push through — but leave most in place to protect against late frosts
Late Spring (Hardneck varieties):
- Scapes appear in late May to June — curly green shoots emerging from the center
- Remove scapes to redirect energy into bulb development
- Scapes are delicious — sauté them, blend into pesto, or pickle them
Fertilizing in Spring:
- Side-dress with compost tea or diluted liquid kelp when shoots are 6 inches tall
- One more application 4–6 weeks later
- Stop fertilizing once scapes appear — the plant is now focusing on bulb development
When to Harvest
Timing is everything with garlic harvest.
Harvest too early → bulbs are small and underdeveloped
Harvest too late → papery wrappers break down, cloves separate, storage life is short
Signs of harvest readiness:
- Lower leaves (bottom 5–6) have turned yellow-brown
- Upper leaves (4–5) are still green
- This typically happens in June–July (zones 5–7)
How to harvest:
- Use a garden fork — insert it a few inches from the plant and lever it up
- Pull gently by the stem
- Brush off (don’t wash) excess dirt
Curing and Storing Garlic
Curing = drying garlic so the papery wrapper forms properly and extends shelf life.
- Lay garlic in a single layer in a dry, shaded, well-ventilated area (a barn, garage, or covered porch)
- Cure for 3–4 weeks
- After curing: trim roots to ½ inch, cut stem to 2–3 inches (or braid softnecks)
- Store in a cool, dry, dark place with good airflow — mesh bags work perfectly
Storage life:
- Hardneck varieties: 4–8 months
- Softneck varieties: 9–12 months
Common Problems & Organic Solutions
White Rot (Sclerotium cepivorum)
Symptoms: Fluffy white mold at the base of the plant, yellowing leaves
Prevention: 4-year crop rotation, never plant alliums in the same bed
Treatment: No cure — remove affected plants, don’t compost them
Fusarium Basal Rot
Symptoms: Pinkish rot at the base, soft decaying cloves
Prevention: Good drainage, organic seed garlic, avoid wounding cloves
Treatment: Remove affected plants
Bulb Mites
Symptoms: Stunted growth, rough brown patches on cloves
Prevention: Plant certified disease-free seed garlic
Treatment: Beneficial nematodes (Steinernema feltiae)
Yellowing Leaves in Spring
Often just normal seasonal senescence — lower leaves yellow as harvest approaches. Check soil pH if yellowing is extreme and early.
Garlic in Raised Beds: Insider Tips
- Plant after your last summer crops — garlic is perfect for succession planting after tomatoes
- Dense planting works — 4 inches apart maximizes yield per square foot
- Companion plant with chamomile — may improve flavor and deter pests
- Mark your rows — garlic disappears under snow; a stake with variety name saves confusion in spring
FAQ: How to Plant Garlic in Fall
Q: Can I plant garlic from the grocery store?
A: Not recommended. Grocery store garlic is often treated with sprout inhibitors and may carry diseases. Always use certified seed garlic.
Q: How deep should I plant garlic cloves?
A: 2–3 inches deep with the pointed end up. In cold climates (zones 3–5), plant at 3 inches to protect from extreme freeze-thaw cycles.
Q: What if I miss the fall planting window?
A: You can try planting in very early spring for a reduced harvest (mostly “rounds”). Or wait until next fall — it’s worth it.
Q: How do I know which end of the clove goes up?
A: The pointed end is the top (where the shoot emerges), and the flat, brown base plate is the bottom (where roots grow). When in doubt, plant vertically — garlic is surprisingly good at correcting itself.
Q: Can garlic survive a hard winter?
A: Yes! With proper mulching, garlic survives temperatures well below 0°F (-18°C). Hardneck varieties are especially cold-hardy.
Conclusion: Grow Your Best Garlic This Fall
Planting garlic in fall takes about an hour of work — and rewards you with months of delicious harvests the following summer. There’s no vegetable that gives you a better return on investment than garlic.
To recap the key steps:
- ✅ Choose the right variety for your zone
- ✅ Plant 4–6 weeks before hard frost, 2–3 inches deep
- ✅ Top-dress with compost and water in well
- ✅ Mulch heavily after the ground starts to freeze
- ✅ Harvest when the bottom leaves yellow (late June–July)
- ✅ Cure for 3–4 weeks before storing
Ready to get started? Grab your seed garlic, prepare your beds, and plant this weekend — your future self in July will thank you.
Have questions about planting garlic? Drop them in the comments — I read and respond to every one.
— The Natural Gardener
Related Articles: