
If you have ever looked at a bowl of vegetable scraps and thought, there has to be a better place for this than the trash, worm composting is a great place to start. This beginner guide to worm composting is for gardeners who want a simple, low-mess way to turn kitchen waste into something their plants will actually love.
Worm composting sounds a little strange until you see how practical it is. A small bin, a handful of the right worms, and a steady supply of food scraps can give you rich castings that improve soil structure, help hold moisture, and add gentle nutrients. It is one of those garden habits that feels small at first and then becomes part of how you grow.
Why worm composting works so well for home gardeners
Traditional compost piles are excellent, but they are not always realistic for every home. If you have a small backyard, a patio, or just a corner in the garage, a worm bin can fit where a full compost setup will not. It also handles kitchen scraps quickly, especially the soft materials that tend to pile up fast, like lettuce, melon rinds, coffee grounds, and peels.
The real appeal is that worms do the work for you. Red wigglers eat decaying organic matter and leave behind castings that are far richer and more plant-friendly than raw scraps. You are not waiting for a giant heap to heat up, and you do not need to turn piles every weekend. For busy gardeners, that is a big reason worm composting sticks.
There is a trade-off, though. Worm bins are not a catch-all system. You cannot toss in everything you would put in a large outdoor compost pile. Meat, dairy, oily food, and large amounts of citrus are better left out. Worm composting is simple, but it works best when you stay within its limits.
Beginner guide to worm composting setup
The best starter setup is not fancy. In fact, simple is usually better because it helps you notice problems early. You need a bin, bedding, worms, air flow, and a spot with steady temperatures.
A plastic tote with a lid works well, as long as it has ventilation holes. Some gardeners prefer a purpose-made worm bin with trays, but you do not need to spend much to get started. The main goal is to create a moist, breathable home that stays dark and does not get too hot or too cold.
For bedding, use shredded newspaper, plain cardboard, brown paper bags, or coco coir. Wet the material and then squeeze it out so it feels like a wrung-out sponge. That moisture level matters. Bedding that is too dry slows the worms down. Bedding that is too wet can turn smelly and compacted.
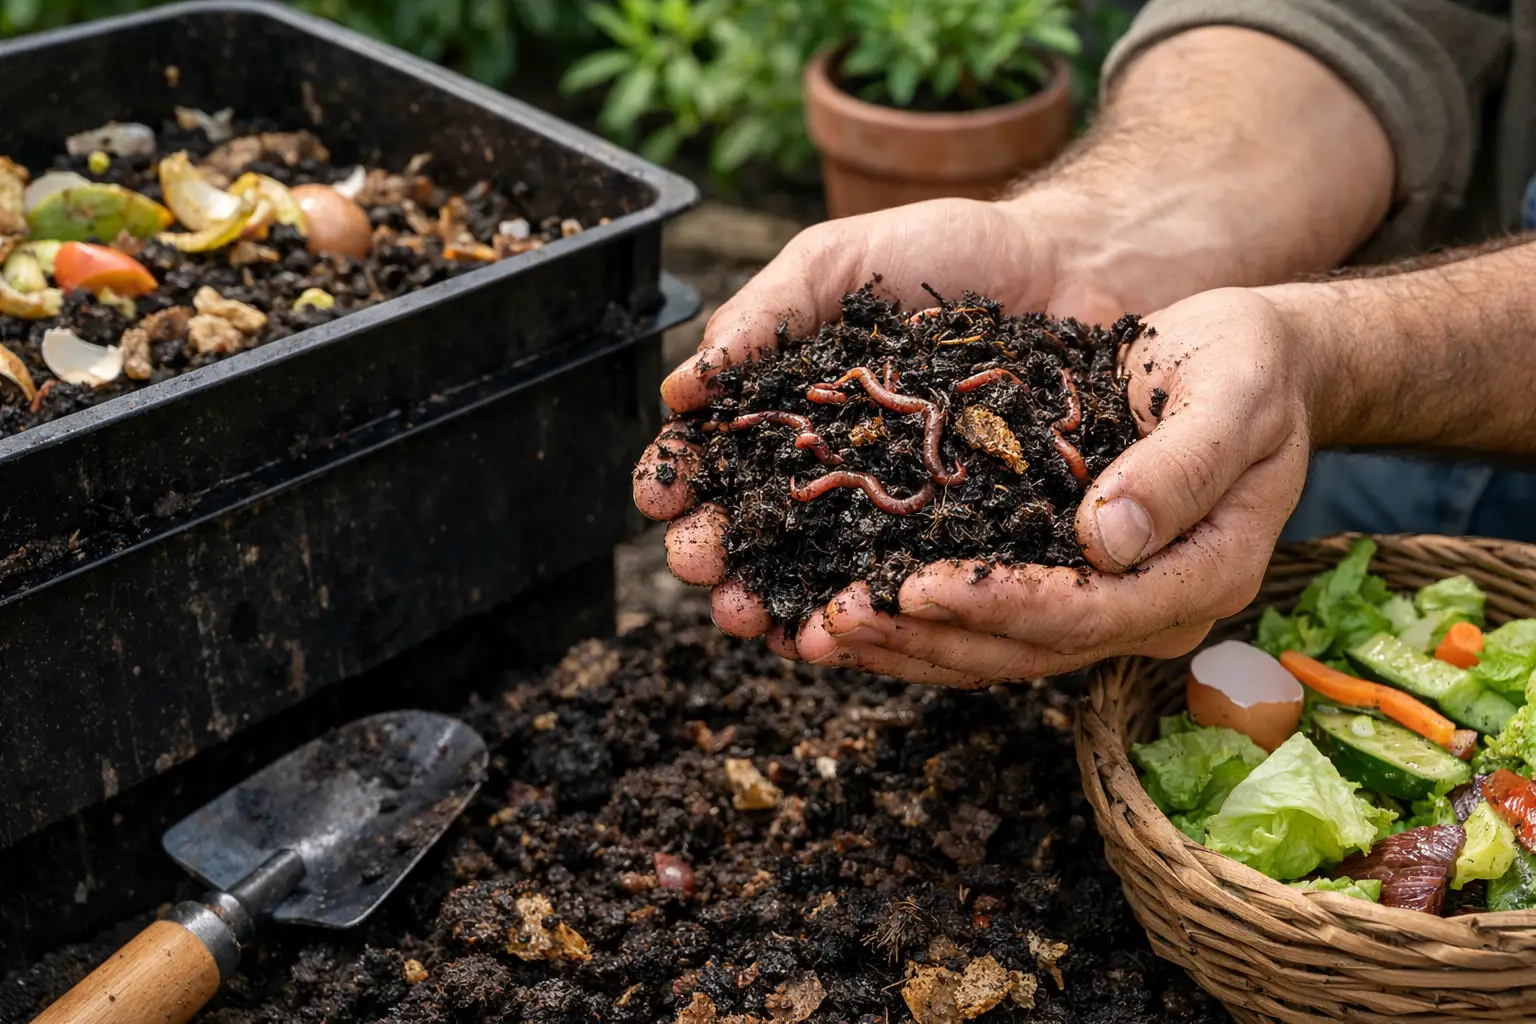
The best worms for the job are red wigglers, not earthworms dug from the yard. Red wigglers live near the surface and thrive in rich organic matter. Common garden earthworms prefer to burrow deeply in soil and usually do poorly in bins.
Set your bin in a place that stays roughly between 55 and 80 degrees. A laundry room, mudroom, garage, shaded porch, or protected outdoor area can all work depending on your climate. In many parts of the US, keeping the bin out of direct summer heat is just as important as protecting it from winter cold.
What to feed composting worms
This is where beginners either get comfortable fast or accidentally create a soggy science experiment. Worms do best with small, regular feedings rather than big dumps of scraps.
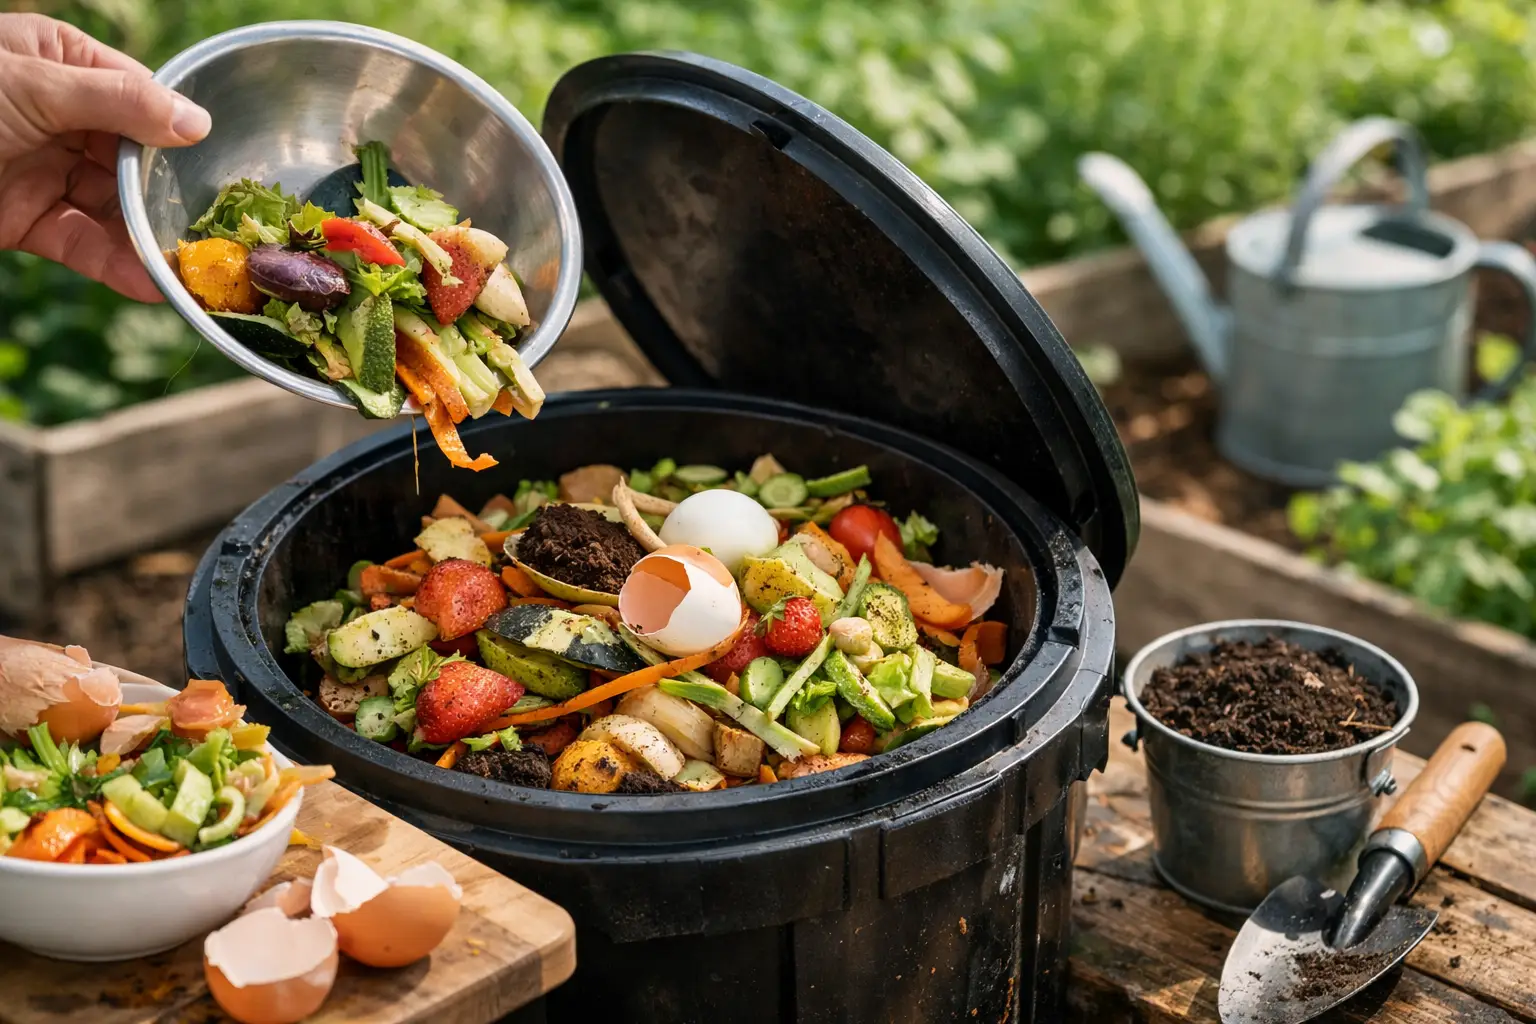
Good worm food includes fruit and vegetable scraps, coffee grounds, tea leaves, crushed eggshells, and small amounts of bread or grains. Soft scraps break down fastest. Chopping food into smaller pieces helps, but it is optional. Freezing and thawing scraps before feeding can speed things up too because the food softens quickly.
Foods to avoid include meat, fish, dairy, greasy leftovers, heavily salted foods, and too much citrus or onion. A little citrus is usually fine in a healthy bin, but a lot can make conditions too acidic. The same goes for spicy foods and garlic. It is not that one orange peel ruins everything. It is the overall balance that matters.
Bury the scraps under the bedding instead of leaving them exposed on top. That cuts down on smells and discourages fruit flies. If you are new to the process, feed less than you think you need. A common early mistake is giving worms more food before they have finished the last batch.
How to care for a worm bin without overthinking it
Once your bin is set up, the routine is refreshingly simple. Check it once or twice a week. Lift the bedding, see how much food is left, and feel the moisture. If the bedding feels dry, mist it lightly or add damp paper. If it feels soggy, mix in dry shredded cardboard and hold off on feeding for a few days.
A healthy worm bin has an earthy smell, not a rotten one. That earthy scent is a good sign that the materials are breaking down the way they should. If the bin smells sour or foul, it usually means there is too much food, too much moisture, or not enough air.
You do not need to stir the whole bin constantly. In fact, too much fussing can disturb the worms. Gentle fluffing now and then is enough if the bedding seems compacted. Most of the time, your job is to keep the balance steady rather than chase perfection.
Common beginner problems and what they usually mean
Most worm composting issues are fixable, and they usually come back to one of three things: moisture, feeding, or temperature.
If your bin smells bad, cut back on food and add more dry bedding. Rotten odors almost always mean the bin is too wet or overloaded. If you see fruit flies, bury scraps more carefully and avoid leaving sweet fruit exposed. Freezing scraps before adding them can help reduce hitchhiking pests.
If the worms seem sluggish or start trying to climb out, check the environment. Bedding that is too dry, too acidic, too hot, or too wet can all cause stress. Sometimes a new bin goes through a short adjustment period where worms explore the sides and lid. That is fairly normal at first. A mass escape attempt is not.
If the bin is attracting ants, it is usually too dry. If it is attracting lots of gnats, there may be too much exposed food. If nothing seems to break down, the bin may be too cold, or you may simply need more time. Worm composting is faster than many people expect, but it is still a biological process, not an overnight fix.
When and how to harvest worm castings
The finished material will look dark, crumbly, and soil-like. Depending on your setup, feeding habits, and temperature, that can take a few months. Some bins produce usable castings sooner in pockets, while others need more time before the whole bin is ready.
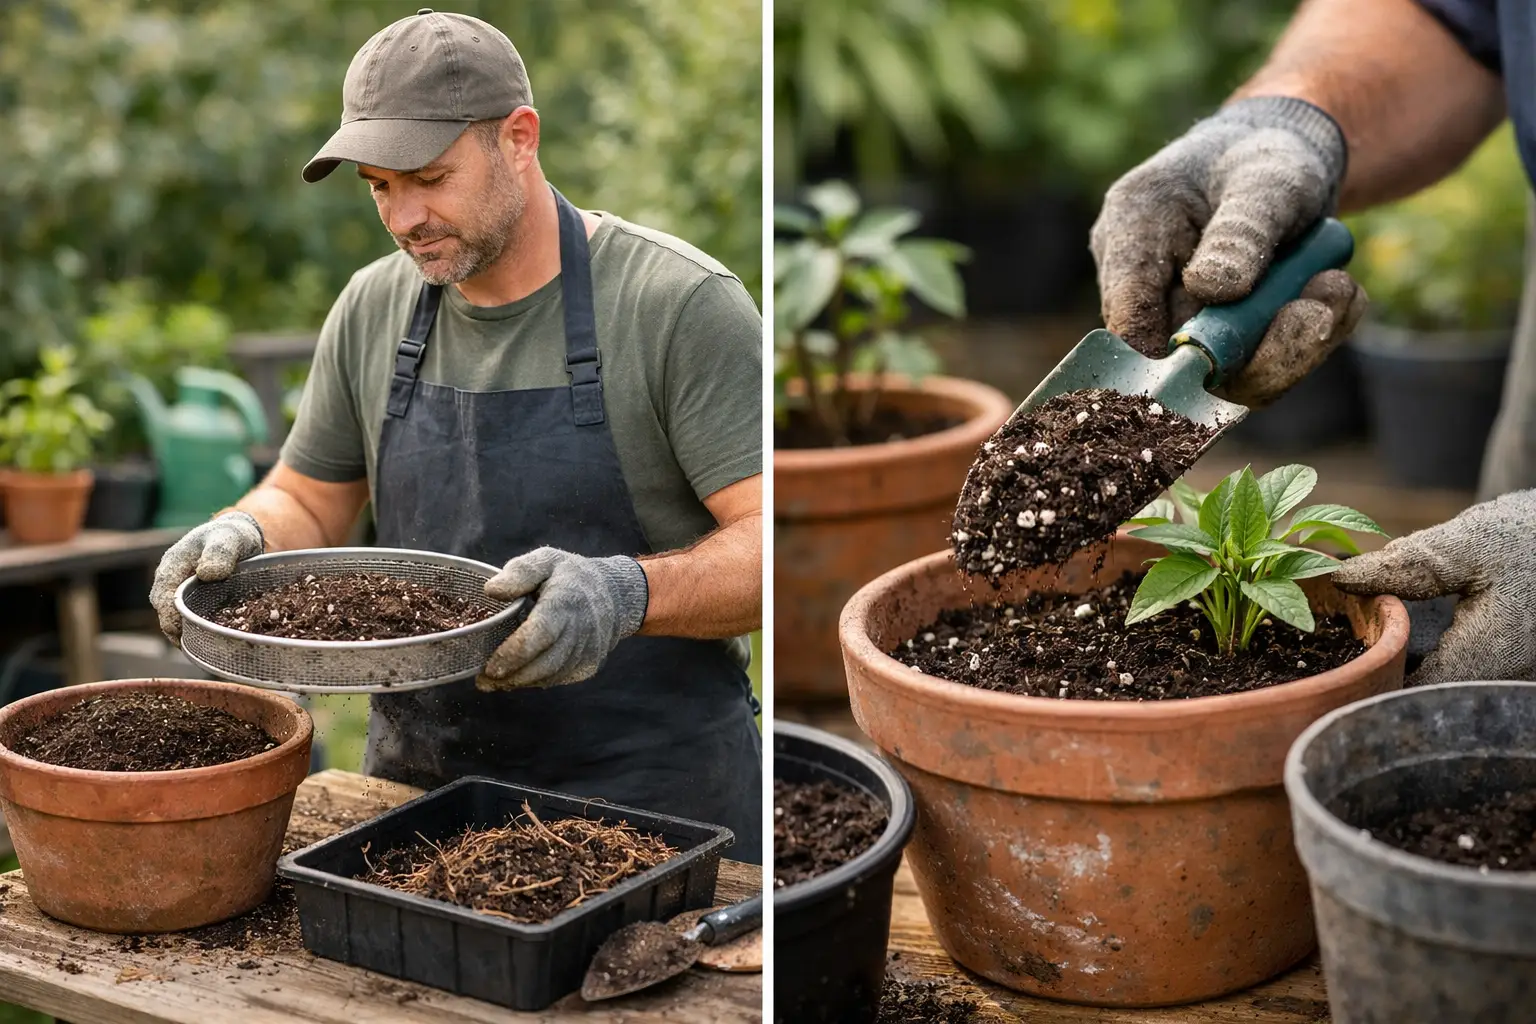
One easy method is to move the contents to one side of the bin and add fresh bedding and food to the other side. Over time, many of the worms will migrate to the new food source, making it easier to collect the finished castings from the older side. You can also dump the contents onto a tarp in soft light and let the worms move away from the surface while you gently remove the castings layer by layer.
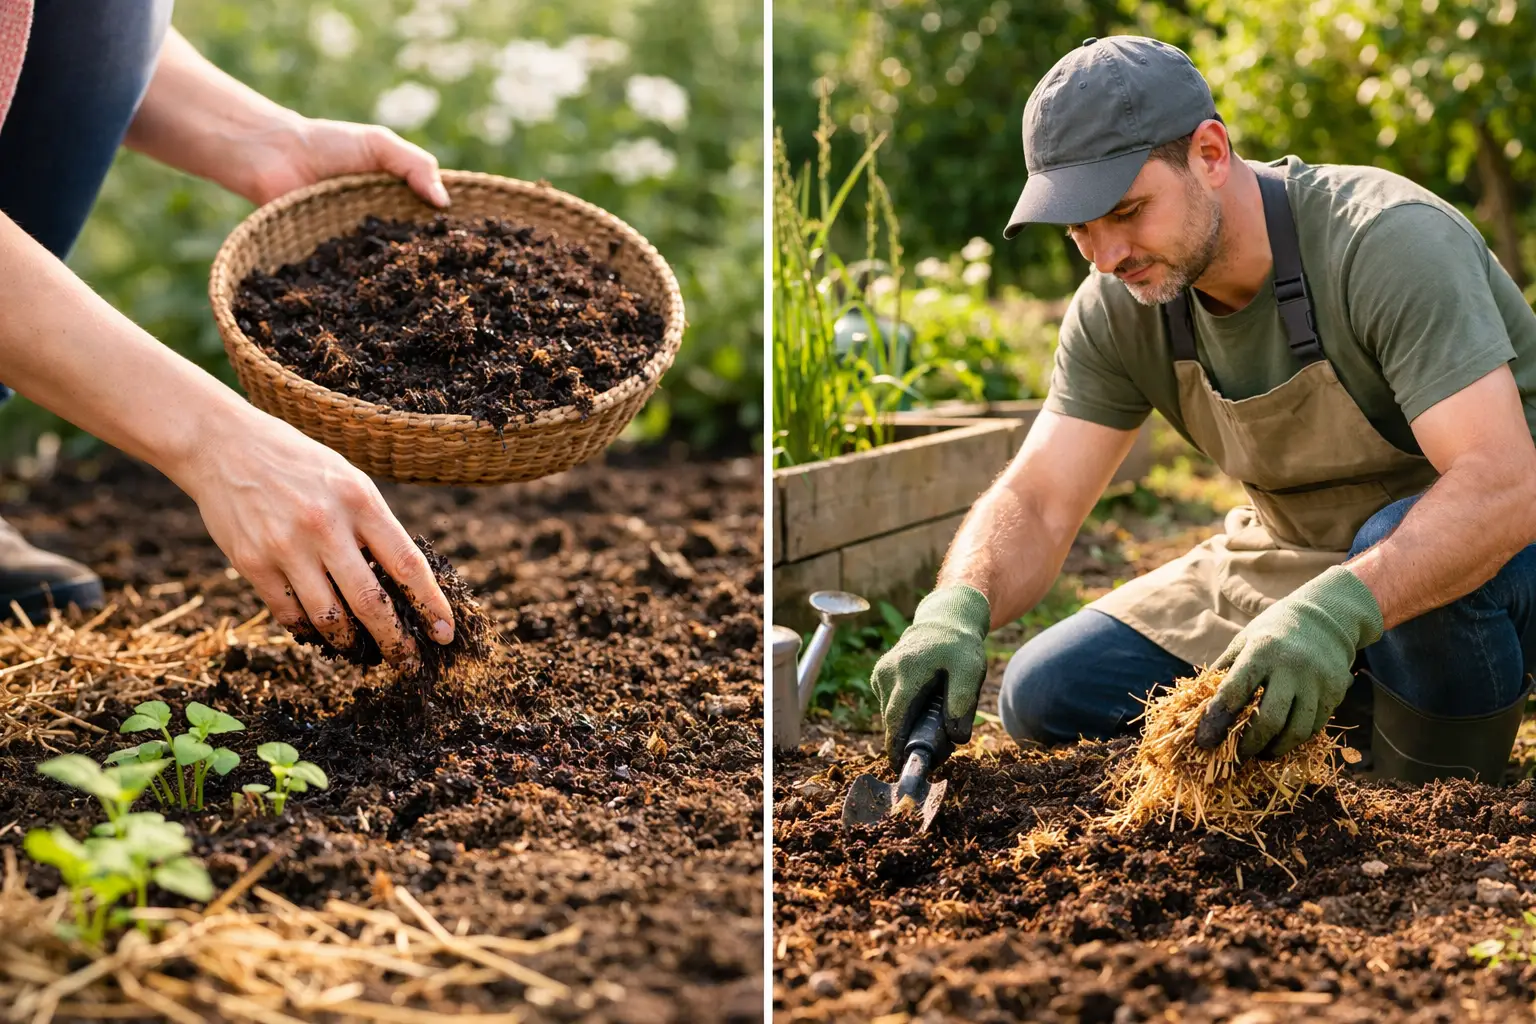
The castings do not need to be used in huge amounts. A small handful mixed into potting soil, tucked into planting holes, or sprinkled around vegetables goes a long way. Think of worm castings as a concentrated soil booster, not a bulk filler.
If your bin produces liquid, be a little cautious. Some systems create true worm tea through a brewing process, but liquid draining from a bin is often just leachate. It may contain unfinished materials and should not automatically be treated like a finished plant tonic. If you collect it, use care and do not assume more is better.
Using worm compost in the garden
This is the rewarding part. Worm castings are gentle enough for seedlings, houseplants, vegetables, herbs, and containers. They improve the life in your soil as much as the texture. For gardeners trying to grow naturally, that matters because healthy soil tends to support steadier plant growth and better resilience.
In raised beds, mix castings into the top few inches around heavy feeders like tomatoes, peppers, squash, and cucumbers. In containers, blend a modest amount into potting mix or top-dress around established plants. You do not need thick layers. A little is often enough to make a visible difference over time.
If you are already using compost, mulch, and organic fertilizer, worm castings fit right in. They are not meant to replace every other input. They are one of those steady, useful additions that help the whole system work better.
Starting a worm bin is less about building the perfect setup and more about building a simple habit. If you keep the bedding moist, feed modestly, and give the worms a stable home, they will handle the hard part. Before long, your kitchen scraps stop feeling like waste and start looking like next season’s better soil.
One thought on “Beginner Guide to Worm Composting”