A windowsill full of pale, leaning tomato seedlings is usually not a sign that you have a brown thumb. It is a sign that one small piece of the setup is missing, most often enough light or a container that holds too much water. The best seed starting supplies do not need to fill a shopping cart. A few dependable basics will give vegetables, herbs, and flowers the strong start they need.
📋 Table of Contents
- Best Seed Starting Supplies: Start With the Essentials
- Seed-starting mix, not garden soil
- Containers with real drainage
- Bottom trays and a humidity cover
- Light Is the Supply That Changes Everything
- Add Warmth Only When the Crop Needs It
- Small Supplies That Prevent Big Mix-Ups
- A Sensible Seed-Starting Shopping List
- Do Not Buy Your Way Around Timing
The goal is simple: create a clean, warm, evenly moist place where a seed can germinate, then provide bright light and room for roots to grow. Start with that job in mind, and it becomes much easier to skip the gadgets that sound useful but spend the season gathering dust.
Best Seed Starting Supplies: Start With the Essentials
For most home gardeners, a simple indoor setup includes a seed-starting mix, containers with drainage, a bottom tray, a clear humidity cover, a light source, labels, and a gentle watering tool. If you start heat-loving crops early, such as peppers, eggplants, and tomatoes, a heat mat is also worthwhile.
That may sound like a lot, but many of these pieces are reusable for years. The supplies that deserve the most attention are the growing mix, light, and drainage. Those three have a bigger effect on seedling health than fancy racks, decorative pots, or complicated watering systems.
Seed-starting mix, not garden soil
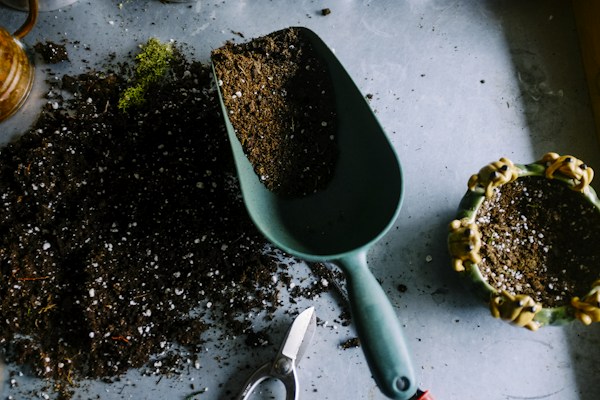
Use a fresh seed-starting mix for sowing seeds. It is lighter and finer than potting soil, which helps small roots push through easily. Quality mixes also hold moisture without becoming dense and soggy, a balance that is hard to achieve with soil scooped from the garden.
Garden soil can carry weed seeds, insect eggs, and soil-borne diseases. It also compacts in small containers, leaving roots short on oxygen. Even a bagged potting mix can be too coarse for tiny lettuce, basil, or pepper seeds, though it works well once seedlings are ready to move into larger pots.
Choose an organic mix made with ingredients such as coconut coir, peat moss, perlite, and composted materials. A mix does not need added fertilizer for germination. Seeds carry enough stored energy to make their first leaves. After seedlings develop their first true leaves, you can begin feeding lightly if your mix has no nutrients.
Containers with real drainage
Nearly any clean container can start seeds if it has drainage holes. Cell trays make it easy to grow many plants in a small space, while small nursery pots give each seedling more room. Soil blocks are another low-waste choice, especially for gardeners who enjoy a hands-on setup and want to avoid plastic cells.
For beginners, a cell tray with a sturdy bottom tray is hard to beat. It keeps plants organized and makes watering less messy. Look for trays made from thicker plastic rather than flimsy single-season trays. They cost a little more up front but can last for many springs with a quick wash and air-dry after use.
Biodegradable pots can be useful, but they come with a trade-off. Some dry out much faster than plastic, while others stay damp and can grow mold. If you use them, place them in a solid tray and check moisture often. Avoid transplanting with the pot rim above the soil line, since exposed material can wick moisture away from the root ball.
Bottom trays and a humidity cover
A leak-proof bottom tray is not glamorous, but it protects tables and makes bottom watering possible. Instead of pouring water over delicate seeds, add water to the tray and let the growing mix absorb it from below. Empty any standing water after 20 to 30 minutes so roots are not left sitting in it.
A clear humidity dome helps the mix stay evenly moist during germination. It is especially useful for slow starters like peppers and parsley. Remove the cover as soon as most seedlings emerge. Leaving it on too long traps stale, humid air and encourages damping-off, a fungal problem that can make young stems collapse at soil level.
Light Is the Supply That Changes Everything
A bright windowsill may work for a few quick-growing plants, but it rarely provides enough light for sturdy vegetable seedlings. Spring days can still be short, and window glass reduces light intensity. If seedlings stretch toward the glass, they are telling you they need more.
A simple LED grow light is one of the best investments you can make. You do not need a complicated commercial system. A full-spectrum LED shop-style light or purpose-made seedling light set on an adjustable stand works well for a modest number of trays.
Keep the light close to the seedlings, usually about 2 to 4 inches above the leaves unless the manufacturer says otherwise. Raise it as plants grow. Run the light for 14 to 16 hours a day on a timer, then give seedlings darkness at night. A timer costs little and saves you from trying to remember one more daily task.
If you are only starting a small tray of basil or lettuce, a sunny window plus a small supplemental grow light may be enough. For tomatoes, peppers, and other plants you plan to grow for several weeks indoors, dedicated overhead light makes a noticeable difference.
Add Warmth Only When the Crop Needs It
Seeds have their own preferences. Lettuce, kale, peas, and many annual flowers germinate well in a cool room. Tomatoes, peppers, eggplants, basil, and melons are happier with warmer soil.
A waterproof seedling heat mat gently warms the root zone and can speed germination of warm-season crops. Use it beneath the tray, ideally with a thermostat. Without one, a heat mat can run warmer than necessary in a warm house. Check the seed packet for germination temperatures rather than assuming every seed wants extra heat.
Take seedlings off the heat mat once they sprout. At that point, bright light and good airflow matter more than warm soil. This simple switch helps prevent soft, stretched growth.
Small Supplies That Prevent Big Mix-Ups
The little items are often what make seed starting feel calm instead of chaotic. Plant labels are essential if you grow more than one variety. A row of seedlings can look nearly identical for weeks, and it is surprisingly easy to forget which pepper or tomato you planted where.
Use a waterproof marker and label each cell or row at planting time. Include the variety name and sowing date. If a batch struggles, those notes help you spot patterns next season. A basic notebook or a note on your phone can track germination dates, feeding, and transplanting too.
A spray bottle is useful for moistening the surface right after sowing, particularly for tiny seeds. After germination, switch to bottom watering or use a small watering can with a narrow spout. Constantly misting established seedlings can keep foliage too wet and does not encourage roots to grow downward.
A small fan is another inexpensive helper if you start several trays indoors. Run it on low for a few hours a day once seedlings have emerged. Gentle air movement strengthens stems and lowers the chance of fungal trouble. The breeze should barely stir the leaves, not flatten them.
A Sensible Seed-Starting Shopping List
If you are buying from scratch, these are the supplies worth prioritizing:
- Fresh organic seed-starting mix
- Cell trays or small pots with drainage, plus solid bottom trays
- Clear humidity domes for germination
- An adjustable LED grow light and timer
- Plant labels and a waterproof marker
- A narrow-spout watering can or a tray for bottom watering
- A heat mat with thermostat for warm-season seeds
- A small fan for better airflow
If your budget is limited, buy the mix, trays, labels, and grow light first. You can germinate many seeds at normal room temperature and use a recycled clear container as a temporary cover. Good light is harder to replace with a workaround.
Do Not Buy Your Way Around Timing
The most carefully chosen supplies cannot fix seeds started at the wrong time. Tomatoes started too early become root-bound and leggy before outdoor temperatures are safe. Zucchini and cucumbers grow quickly and are often best started only a few weeks before planting out, or directly sown once soil has warmed.
Count backward from your typical last spring frost date, then check each seed packet for its recommended indoor starting window. In much of the US, that date varies widely, even within the same state. Your local weather history is more useful than a national planting calendar.
Before moving seedlings outdoors, harden them off gradually. Set them outside in shade for a short period, then slowly increase their time and sun exposure over seven to 10 days. Indoor-grown plants need that transition, even when they look strong under grow lights.
The best setup is the one you will use and maintain. Keep it clean, label what you plant, check moisture daily, and give young plants enough light from the start. A few simple supplies, paired with a little patient attention, can turn a packet of seeds into the beginning of a garden you will be proud to harvest from.