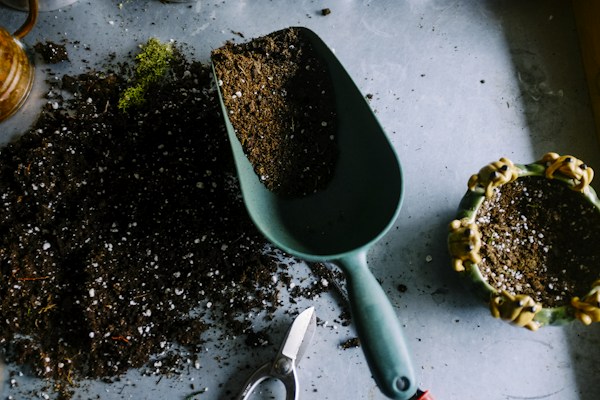
Growing potatoes in containers is one of the most rewarding gardening projects you can do — even with limited outdoor space. Whether you’re on a balcony, patio, or small backyard, container potatoes deliver a satisfying harvest without needing a dedicated garden bed. This guide covers everything from choosing the right container and variety to harvest day.
📋 Table of Contents
- Why Grow Potatoes in Containers?
- Best Potato Varieties for Containers
- Compact and Early Varieties
- Varieties to Avoid in Containers
- What Size Container Do You Need?
- Best Container Types
- Soil Mix for Container Potatoes
- Ideal Potting Mix Recipe
- Pre-Fill Amendments
- Chitting: The Secret to Earlier, Better Harvests
- How to Chit Potatoes
- When to Plant Container Potatoes
- Spring Planting
- Fall Planting (Warm Climates)
- Summer Planting for Late Harvest
- Step-by-Step Planting Guide
- Step 1: Prepare Your Seed Potatoes
- Step 2: Fill Container Partially
- Step 3: Place Seed Potatoes
- Step 4: Cover with Soil
- Step 5: Hill as Plants Grow
- Watering Container Potatoes
- Watering Schedule
- How Much to Water
- Drip Irrigation for Containers
- Fertilizing Container Potatoes
- Fertilization Timeline
- Organic Fertilizer Options
- Common Pests and Diseases
- Colorado Potato Beetle
- Aphids
- Late Blight (Phytophthora infestans)
- Early Blight (Alternaria solani)
- Scab (Streptomyces scabies)
- Monitoring and Troubleshooting
- Plants Are Yellow and Spindly
- No Flowers Appearing
- Leaves Are Curling and Mottled
- Containers Tipping Over
- When and How to Harvest
- Timing Your Harvest
- Harvest Steps
- Curing for Storage
- Storing Your Harvest
- Growing Potatoes in Containers: Season Calendar
- Frequently Asked Questions
- Container Potato Companion Planting
- Top Mistakes to Avoid
- Container & Vegetable Growing Guides
Why Grow Potatoes in Containers?
Container growing offers several advantages over in-ground planting:
- No digging at harvest — just tip the container and collect your potatoes
- Pest and disease management — fresh potting mix each year eliminates soilborne problems
- Space efficiency — grow on patios, balconies, or driveways
- Earlier starts — containers warm up faster than garden soil in spring
- Better control — manage drainage, soil quality, and watering precisely
The one downside? Containers dry out faster than ground soil. You’ll need to water more frequently, especially during hot weather. But once you get the rhythm, container potatoes are almost foolproof.
Best Potato Varieties for Containers
Not all potatoes perform equally well in containers. You want varieties that set tubers prolifically and don’t need enormous root runs.
Compact and Early Varieties
Yukon Gold — A classic choice. Buttery yellow flesh, excellent flavor, matures in 70–80 days. Sets reliably in containers and produces medium-sized tubers that don’t crowd each other.
Red Norland — Early variety (65–70 days), great for container growing. Red skin with white flesh. Excellent disease resistance.
Kennebec — A mid-season white potato with outstanding yields. Slightly larger vine, so use a 15–25 gallon container.
Fingerling varieties (Russian Banana, French Fingerling) — Compact tubers that nestle easily in containers. Gourmet flavor, high value. Great for 10-gallon containers.
Purple Majesty / All Blue — Novelty varieties with purple flesh and excellent anthocyanin content. Moderate yields but high visual appeal.
Varieties to Avoid in Containers
Late-season behemoths like Russet Burbank or Katahdin need deep soil and a long season. They underperform in containers — skip them for your patio setup.
What Size Container Do You Need?
Container size directly impacts yield. Larger containers = more tubers.
| Container Size | Best For | Expected Yield |
|---|---|---|
| 5 gallons | 1–2 seed potatoes, fingerlings | 1–2 lbs |
| 10 gallons | 2–3 seed potatoes, early varieties | 3–5 lbs |
| 15–25 gallons | 3–5 seed potatoes, any variety | 5–10 lbs |
| Grow bag (10 gal) | 2–3 seed potatoes | 3–6 lbs |
| Fabric grow bag (20 gal) | 4–5 seed potatoes | 7–12 lbs |
Depth matters more than diameter. Potatoes form along the buried stem (called stolons), so you need at least 12–15 inches of growing depth. Deeper is better — 18–24 inches is ideal for maximum tubers.
Best Container Types
Fabric grow bags are the top choice for most gardeners. They’re breathable (prevents root rot and allows “air pruning”), lightweight, foldable, and inexpensive. The 10–20 gallon fabric bags are the sweet spot for backyard gardeners.
Plastic containers work well but need excellent drainage holes — at least 5–6 holes at the base. Dark plastic absorbs heat, which can be beneficial in cool climates or problematic in very hot regions.
Trash cans (30-gallon) are a budget-friendly option. Drill 8–10 holes in the bottom. They’re large enough for a serious harvest.
Wooden crates or wine barrels look great and work beautifully, though they’re heavy and retain moisture differently than plastic.
Avoid glazed ceramic pots — they don’t breathe and can become waterlogged, leading to rot.
Soil Mix for Container Potatoes
The right soil is critical. Garden soil is a poor choice — it compacts heavily in containers and restricts tuber development.
Ideal Potting Mix Recipe
Mix together:
- 40% high-quality potting mix (not soil)
- 30% compost (well-rotted, weed-free)
- 20% perlite (for drainage)
- 10% coir fiber (for moisture retention)
This blend drains well while holding enough moisture between waterings. Potatoes hate soggy conditions — the mix should feel moist but never waterlogged.
Pre-Fill Amendments
Before planting, mix into the bottom layer:
- 1 cup bone meal per 10 gallons (phosphorus for tuber formation)
- ½ cup kelp meal (micronutrients and growth hormones)
- 1 cup greensand (potassium for starchy tubers)
- Avoid high-nitrogen fertilizers at planting — they encourage leafy growth over tuber formation
Chitting: The Secret to Earlier, Better Harvests
Chitting (also called “sprouting”) means encouraging seed potatoes to develop small green sprouts before planting. This gives them a 2–3 week head start.
How to Chit Potatoes
- Place seed potatoes in egg cartons or trays, eyes facing up
- Set in a cool, bright spot (not direct sun) — around 50°F is ideal
- Leave for 3–6 weeks until sprouts are ½ to 1 inch long
- Plant when sprouts are firm and purple-green, not pale and spindly
Chitting is especially valuable for container growing, where the growing season may be limited by heat or drought stress.
When to Plant Container Potatoes
The beauty of containers: you can start earlier than in-ground planting because containers warm up faster.
Spring Planting
Plant 2–4 weeks before your last expected frost date. If a frost threatens, move containers inside or cover them — that’s the flexibility containers provide.
General timing by region:
- Zones 3–4: late April to mid-May
- Zones 5–6: early to mid-April
- Zones 7–8: late February to mid-March
- Zones 9–10: January to February (or fall planting for winter harvest)
Fall Planting (Warm Climates)
In Zones 9–10, plant in September–October for a December–January harvest. Summer heat is too intense for potatoes, so the fall/winter growing season is optimal.
Summer Planting for Late Harvest
In Zones 5–7, a second planting in early July can yield a fall harvest. Use early-season varieties that mature in 65–75 days.
Step-by-Step Planting Guide
Step 1: Prepare Your Seed Potatoes
Buy certified disease-free seed potatoes from a reputable supplier — never grocery store potatoes, which may be treated with sprout inhibitors.
If seed potatoes are larger than a golf ball, cut them into pieces with 2–3 eyes each. Let cut pieces dry for 24–48 hours in a warm, airy spot to form a protective callous before planting.
Step 2: Fill Container Partially
Fill the container with 4–6 inches of your potting mix. Do not fill it to the top — you need room to “hill up” later.
Step 3: Place Seed Potatoes
Set seed potatoes on the soil surface, eyes (sprouts) facing up:
- 10-gallon container: 2–3 potatoes
- 15-gallon container: 3–4 potatoes
- Space them evenly across the container floor
Step 4: Cover with Soil
Cover potatoes with 3–4 inches of soil. Water thoroughly. You should now have 6–10 inches of space remaining above the soil.
Step 5: Hill as Plants Grow
This is the key technique for maximizing yield. As potato plants grow:
- When vines reach 6–8 inches tall, add 3–4 inches of soil mix, leaving the top 2–3 leaves exposed
- Repeat every 2–3 weeks until the container is nearly full
- Each buried stem section produces more tubers
This “hilling” technique can triple your yield compared to single-depth planting.
Watering Container Potatoes
Containers dry out much faster than in-ground beds. Consistent moisture is critical during tuber development.
Watering Schedule
- Pre-flowering: Water when the top inch of soil feels dry. Typically every 2–3 days in warm weather.
- During flowering and tuber formation: More critical. Check daily in summer. Moisture stress at this stage directly reduces yield.
- After vines begin to yellow: Reduce watering. The plants are entering dormancy. Excess moisture can rot mature tubers.
How Much to Water
Water until you see runoff from the drainage holes. This ensures the entire root zone is moistened, not just the surface.
Pro tip: Place a saucer under the container in hot, dry weather to allow the plant to draw up water. Remove the saucer in prolonged wet periods to prevent waterlogging.
Drip Irrigation for Containers
If you have multiple containers, a simple drip irrigation system with a timer takes the guesswork out of watering and dramatically improves yields by maintaining consistent moisture.
Fertilizing Container Potatoes
Potatoes are heavy feeders but need the right nutrients at the right time.
Fertilization Timeline
At planting: Bone meal and other organic amendments (added to soil mix).
2 weeks after planting: Begin liquid fertilization. Use a balanced fertilizer (10-10-10) or tomato fertilizer diluted to half strength. Apply every 2 weeks.
At flowering: Switch to a high-potassium fertilizer (such as 0-10-10 or a tomato/bloom formula). This encourages tuber swelling rather than leafy growth.
After flowering: Discontinue fertilization as plants approach dormancy.
Organic Fertilizer Options
- Fish emulsion: Excellent general-purpose liquid fertilizer. Apply every 2 weeks at half strength.
- Seaweed extract: High in potassium, great during tuber development.
- Compost tea: Applies nutrients and beneficial microorganisms. Brew for 24 hours and apply weekly.
- Worm castings: Mix into the potting soil or use as a top-dressing during hilling.
Common Pests and Diseases
Container growing significantly reduces pest and disease pressure, but these problems can still appear.
Colorado Potato Beetle
The most destructive potato pest. Yellow and black striped beetles and their orange larvae devour foliage rapidly.
Control: Hand-pick adults and larvae. Look for clusters of orange eggs on the undersides of leaves and crush them. Apply spinosad or pyrethrin if populations are high.
Aphids
Clusters of small green, black, or pink insects on new growth. They transmit viral diseases.
Control: Blast off with a strong water spray. Apply insecticidal soap or neem oil. Attract ladybugs and lacewings.
Late Blight (Phytophthora infestans)
Water-soaked brown spots on leaves that spread rapidly in cool, wet conditions. The same pathogen that caused the Irish Potato Famine.
Prevention: Use certified disease-free seed potatoes. Avoid overhead watering. Ensure good air circulation. Remove and destroy affected foliage promptly.
Organic control: Copper-based fungicides (copper sulfate or copper hydroxide) applied preventatively during wet weather.
Early Blight (Alternaria solani)
Dark, concentric-ring spots on lower leaves. Less destructive than late blight.
Control: Remove affected leaves. Copper fungicides. Maintain good airflow.
Scab (Streptomyces scabies)
Rough, corky patches on tuber surfaces. Primarily aesthetic — doesn’t affect flavor.
Prevention: Maintain soil pH between 5.0–5.5. Avoid lime or wood ash near potatoes. Fresh potting mix each year prevents soilborne scab.
Monitoring and Troubleshooting
Plants Are Yellow and Spindly
Usually a sign of insufficient light. Potatoes need 6–8 hours of direct sun. Move containers to a sunnier location.
Can also indicate nitrogen deficiency — apply fish emulsion.
No Flowers Appearing
Some potato varieties produce few or no flowers. This is fine — tubers form regardless of flower production. You can trigger harvest timing by checking tubers rather than waiting for flowers.
Leaves Are Curling and Mottled
Possible viral infection (mosaic virus) spread by aphids. Remove and destroy affected plants — there’s no cure. Control aphids rigorously.
Containers Tipping Over
As plants grow tall and top-heavy, containers can tip. Place them against a fence or wall for support. Use a tomato cage or stake for extra tall plants.
When and How to Harvest
Timing Your Harvest
New potatoes (small, waxy): Begin 10–12 weeks after planting, when the plants are flowering. Reach in from the side and feel for small tubers. Take only the largest, leaving the rest to continue developing.
Full harvest: Wait until the vines yellow and die back naturally — this signals the tubers have fully mature skins. After die-back, wait another 1–2 weeks before harvesting to allow skins to cure further.
Container advantage: You can tip the container onto a tarp and sort through the entire soil mass — no digging required. It feels like a treasure hunt.
Harvest Steps
- Stop watering 1–2 weeks before harvest to allow skins to firm up
- Tip the container onto a tarp or into a wheelbarrow
- Sift through the soil by hand to find all tubers
- Brush off soil — don’t wash potatoes before storing
- Sort: firm, intact tubers for storage; any damaged or nicked tubers for immediate use
Curing for Storage
Let harvested potatoes rest in a dark, cool, well-ventilated space at 50–60°F for 1–2 weeks before storage. Curing thickens the skin and heals small nicks, dramatically extending shelf life.
Storing Your Harvest
| Variety Type | Storage Duration |
|---|---|
| New/waxy potatoes | 1–2 weeks refrigerated |
| Fingerlings | 3–4 weeks at cool room temp |
| Yellow/white potatoes | 2–3 months in cool dark space |
| Russets and late varieties | 4–6 months |
Ideal storage conditions: 38–42°F, 95% humidity, complete darkness. A root cellar, basement, or cool pantry works well.
Never store potatoes in the refrigerator for long periods — starch converts to sugar in cold temps, causing a sweet, unpleasant flavor when cooked.
Keep potatoes away from onions — both produce gases that accelerate each other’s deterioration.
Growing Potatoes in Containers: Season Calendar
| Month | Action |
|---|---|
| February–March (Zones 7–9) | Begin chitting seed potatoes |
| March–April (Zones 5–7) | Plant in containers; move indoors if frost threatens |
| April–June | Water regularly; hill up soil as plants grow |
| June–July | Flowering; begin potassium-rich fertilization; check for new potatoes |
| July–August | Vines begin yellowing; reduce watering |
| August–September | Harvest when vines are dead; cure 1–2 weeks |
| September (Zones 9–10) | Begin fall planting cycle |
Frequently Asked Questions
Q: Can I reuse the same potting mix next year?
A: It’s not recommended. Used potting mix may harbor soilborne diseases (like late blight or scab) and will be depleted of nutrients. Mix it into your compost or garden beds and start with fresh mix each season.
Q: How many pounds of potatoes can I expect from a container?
A: A well-managed 15-gallon container typically yields 5–8 lbs of potatoes. A 20-gallon fabric bag with 4–5 seed potatoes can produce 8–12 lbs. Results vary by variety, climate, and care.
Q: My potatoes turned green — are they safe to eat?
A: Green potatoes contain solanine, a toxic compound. Never eat green-skinned potatoes. Prevent greening by keeping developing tubers fully covered with soil — never allow them to see sunlight.
Q: Do I need to water every day?
A: In summer heat, yes — containers can dry out within 24 hours. Stick your finger 1 inch into the soil; if it’s dry, water immediately. In cooler weather, every 2–3 days may suffice.
Q: Can I grow potatoes from store-bought potatoes?
A: Technically yes, but it’s strongly discouraged. Grocery store potatoes are often treated with sprout inhibitors, may carry disease, and aren’t certified disease-free. Always use certified seed potatoes.
Q: What’s the best container for growing potatoes?
A: Fabric grow bags (10–20 gallons) are the top choice for most gardeners — breathable, lightweight, and inexpensive. Plastic containers with good drainage work nearly as well.
Container Potato Companion Planting
Even in containers, you can companion plant to deter pests and maximize space.
Best companions:
- Horseradish: Plant one in a separate container nearby. Its volatile oils deter Colorado potato beetles.
- Marigolds: Interplant around the container rim. Repel nematodes and aphids.
- Basil: Said to improve potato flavor and deter pests (plant in a separate container nearby).
- Cilantro and dill: Attract beneficial insects that prey on aphids and potato beetles.
Avoid near potatoes:
- Tomatoes, peppers, and eggplants (share diseases)
- Fennel (allelopathic, inhibits many vegetables)
- Sunflowers (compete aggressively for resources)
Top Mistakes to Avoid
1. Planting without chitting. Unchitted potatoes in containers often struggle to establish quickly. Spend 3–4 weeks chitting before planting.
2. Filling the container to the top at planting. Leave room for hilling — it’s essential for yield.
3. Overwatering early, underwatering during tuber fill. Match watering intensity to growth stage.
4. Skipping the high-potassium fertilizer. Most container gardeners use balanced fertilizer throughout. Switching to potassium-heavy formula at flowering significantly increases tuber size.
5. Harvesting too early. Wait for vines to die back completely for full-size, storage-quality tubers. New potatoes are delicious but smaller.
6. Not curing before storage. Uncured potatoes deteriorate quickly. Always cure for 1–2 weeks.
Growing potatoes in containers is a genuinely satisfying experience — the harvest moment when you tip the container and find a pile of perfect potatoes is unmatched in container gardening. With the right variety, container size, and care routine, you can harvest 10+ lbs of organic potatoes from your patio season after season.
Start with a 15-gallon fabric grow bag, three Yukon Gold seed potatoes, and our guide above. By mid-summer, you’ll have more potatoes than you expected — and a new favorite garden project.