The first time you carry watering cans back and forth across the yard during a July dry spell, a rain barrel starts to look less like a garden accessory and more like a very good idea. A simple rain barrel setup guide can help you capture water that would otherwise rush off the roof and down the driveway, then put it to work in your vegetable beds, flower borders, and containers.
Rainwater is free, gentle on plants, and especially handy for gardeners trying to use resources thoughtfully. The goal is not to build a complicated system. One well-installed barrel can make hand-watering easier, reduce runoff around your foundation, and give your garden a helpful backup when the weather turns dry.
Start With the Right Spot
The best location is underneath a downspout that already carries a good amount of roof runoff. Watch your gutters during the next rain if you are unsure which one fills fastest. A section of roof can collect far more water than most gardeners expect, so even a modest rainfall may fill a 50-gallon barrel quickly.
Choose a spot close enough to the plants you water most often. A barrel tucked beside a distant corner of the house may technically collect water, but it will not help much if hauling a full watering can across the yard becomes a chore. Near a vegetable garden, raised bed, or patio containers is usually ideal.
There are two safety details worth taking seriously. First, the barrel needs a level, solid base. A full 55-gallon barrel can weigh more than 450 pounds. Second, plan where overflow water will go. Keep it away from the house foundation, neighboring property, and spots that stay soggy after rain.
Before buying supplies, check your local rules. Rainwater collection is widely allowed across the US, but some cities, homeowner associations, or water districts have requirements about placement, overflow, or visible barrels.
What You Need for a Basic Rain Barrel Setup
A ready-made rain barrel is the easiest route, but a food-grade barrel can work well if it is clean and designed for water storage. Avoid barrels that previously held unknown chemicals. Dark, opaque barrels are best because they limit algae growth.
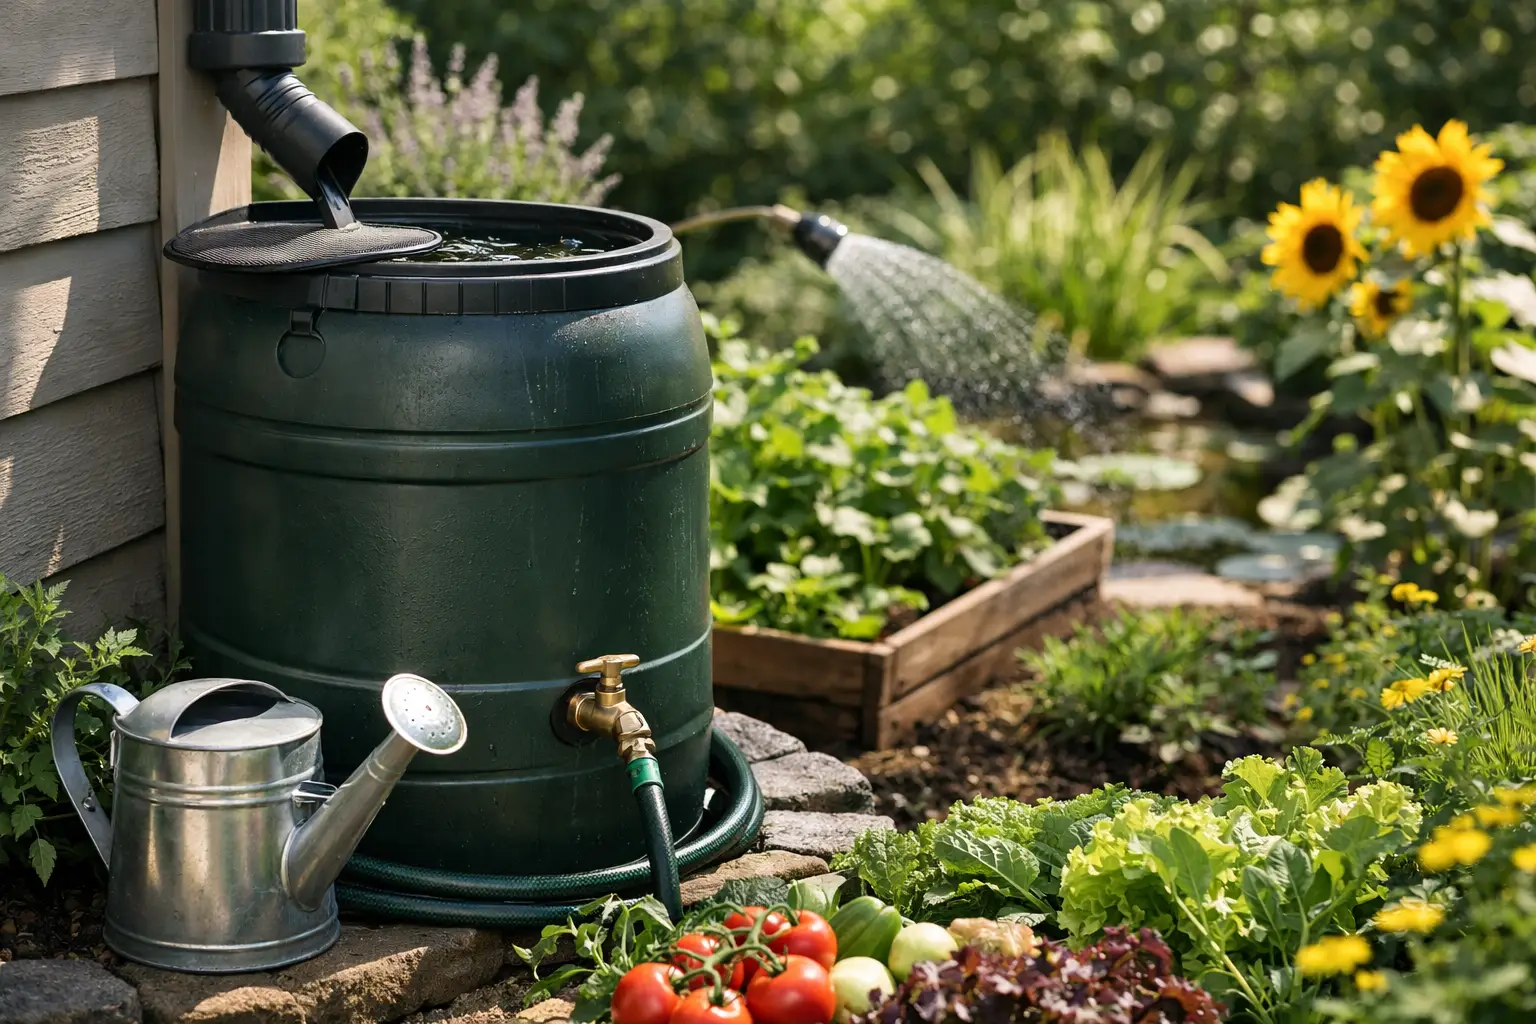
For a reliable basic setup, gather these items:
- A rain barrel with a secure lid, spigot, and overflow outlet
- A sturdy base, such as concrete blocks, pavers, or a purpose-built stand
- A downspout diverter or flexible downspout elbow
- Fine mesh screen for the top opening and overflow outlet
- An overflow hose long enough to direct excess water safely
- A watering can or garden hose, depending on your barrel’s spigot
Raising the barrel on a stable base makes watering much easier. Gravity gives you better flow from the spigot, and you can slide a watering can underneath without tilting it. Do not stack loose bricks or set the barrel on soft soil. What looks level on a dry afternoon can shift after a soaking rain.
Rain Barrel Setup Guide: Install It Step by Step
Prepare the base first
Clear away mulch, grass, and loose soil where the barrel will sit. Set pavers or blocks on compacted ground and check them with a level in both directions. Take your time here. A barrel that leans even slightly when empty can become unstable once it fills.
Place the barrel on the base and make sure you can comfortably reach the spigot. Leave enough room to remove the lid or screen for occasional cleaning.
Connect the downspout
Most gardeners find a diverter kit simpler than cutting the downspout directly into the barrel lid. A diverter sends water into the barrel while it has capacity, then allows excess water to continue through the downspout when the barrel is full. It is a tidy option and helps prevent water from backing up in the gutter.
Follow the measurements provided with your diverter. Usually, you will mark the downspout, cut out a short section, and fit the diverter in place. If you are not using a diverter, attach a flexible elbow to guide water into the screened opening in the barrel. This approach is less precise, but it can work for a straightforward first setup.
Keep the lid on and the opening screened. Mosquitoes can breed in surprisingly small amounts of standing water, and leaves will quickly make a mess of an uncovered barrel. A tight-fitting lid also keeps curious children and animals safer.
Direct the overflow
This is the step people often skip, then regret during the first hard rain. Attach a hose to the overflow outlet near the top of the barrel. Run it at least several feet away from the foundation and toward a spot that can absorb water without washing out soil.
If your yard slopes toward the house, be extra careful. In that case, extend the overflow hose farther downhill or consider choosing a different downspout location. The barrel should reduce water problems, not move them closer to your home.
Test before the next storm
Pour a few gallons of water into the barrel or wait for a light rain. Check the spigot, downspout connection, and overflow outlet for drips. Confirm that water moves away from the house once the barrel reaches the overflow level.
This small test is much easier than discovering a loose fitting during a thunderstorm. If the barrel wobbles, empty it and fix the base before using it again.
Use Stored Rainwater Where It Helps Most
Rain barrel water is especially useful for outdoor ornamental plants, established shrubs, annual flowers, and edible gardens. Tomatoes, peppers, beans, cucumbers, and leafy greens all appreciate steady moisture at the root zone. Water slowly around the base of plants rather than spraying foliage, especially later in the day when wet leaves can encourage disease.
A barrel is most valuable when you use it strategically. During a dry week, prioritize newly planted seedlings, containers, and crops that are flowering or setting fruit. Established native plants and deeply rooted perennials may need less help. This keeps your stored water available for the plants most likely to suffer first.
For vegetable gardens, use rainwater on the soil, not directly on leaves you plan to harvest that day. If your roof has been treated with moss-control chemicals, or if you are concerned about roofing materials and runoff, reserve that water for ornamentals instead. Roof runoff is not drinking water, and it should never be used for cooking, bathing, or filling pet bowls.
A standard barrel also relies on gravity, so do not expect the pressure needed for a sprinkler. It works beautifully with a watering can, a short soaker hose, or slow hand-watering. For a larger irrigation system, you may need multiple barrels, a pump, and more careful planning.
Keep It Clean Without Making It a Project
A rain barrel is low-maintenance, not no-maintenance. Check the screen every few weeks during leaf season and clear off debris that blocks water flow. Once or twice a year, empty the barrel, rinse out settled sediment, and inspect the spigot, lid, and overflow hose.
If water develops an odor, algae, or mosquito larvae, empty the barrel and clean it with a brush and mild soap. Rinse thoroughly before reconnecting it. Usually, these issues come back to sunlight entering the barrel or a gap in the screen, so solve the cause rather than repeatedly treating the water.
In areas with freezing winters, disconnect the barrel before sustained hard freezes. Drain it fully, remove the diverter if the manufacturer recommends it, and store the barrel upside down or cover it securely. Water expands as it freezes, and a cracked barrel is an avoidable spring expense.
One Barrel Is a Good Beginning
A rain barrel will not replace every watering need in a hot, dry summer. It may fill and empty fast during a stormy week, then sit empty during a long drought. That is normal. Think of it as one practical part of a water-wise garden, alongside mulch, healthy soil, closely spaced plants, and choosing crops suited to your conditions.
Once you see how often you reach for that stored water, you can decide whether a second barrel makes sense. Start with one secure setup, pay attention to how your garden uses water, and let the next rain do a little of the work for you.